Distribute React Native Apps by Building a CI/CD Pipeline Using Fastlane and Github Actions (Android)
Victor Bruce
Tue Oct 19 2021
This is part four (final part) of the blog series "Publish your Production-Ready React App To Production". In part 1, we looked at how to prepare a React Native App for production. After, we went through how to manually distribute a React Native app to production using Firebase App Distribution. And in part 3, we looked at how to automate the process of releasing our app to Firebase App Distribution using Fastlane.
In this part, we will continue from where we left off in part 3 and build a CI/CD pipeline using GitHub Actions and Fastlane.
Topics to cover:
- Automatic Versioning
- Building a CI/CD pipeline to bundle and release our App
Automatic Versioning
Working with a cross-platform mobile framework like React Native means at the end of the day, your javascript code will be transpiled to two native codebases (Objective-c and Java). The problem with this when it comes to assigning version numbers to files is that:
- You will have to open the file
./android/app/build.gradleto modify the version number. - You will have to do the same thing for iOS as well by editing the configurations using Xcode
- Lastly, you will have to modify your Javascript(
package.json) version number to keep it in sync with the Android and iOS version numbers.
Going through each step above upon every release of a feature of your app is very repetitive, unproductive, and error-prone since the developer might forget to update one of the files.
The Solution
We need a single file to serve as a source of truth. We want our Android and iOS versions to match whatever package.json version number is set to.
Here, we are going to:
- Use
npm versionto handle the Javascript package version. - Use fastlane to update the Android and iOS sides by getting the version number set in
package.jsonfile. - Combine steps one and two into a single npm script.
Steps:
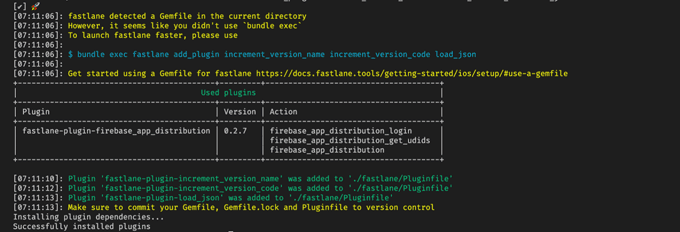
1. Install Plugins:
Inside the root folder of your project, add the plugins below to fastlane.
# install plugins
fastlane add_plugin increment_version_name increment_version_code load_json- increment_version_name: Increases the version name of your project
- increment_version_code: Increases the version code of your project.
- load_json: Loads a local JSON file and parses it.
2. Add Fastlane Scripts to Fastfile:
Under this step, we will write a script to increment our android version inside our Fastfile.
# --------- Bump Android Version ---------------
desc "Android: Increase versionCode"
package = load_json(json_path: "./package.json")
private_lane :increase_android_version do
  increment_version_code(gradle_file_path: './android/app/build.gradle')
  increment_version_name(gradle_file_path: './android/app/build.gradle', version_name: package['version'])
end

# --------- Bump iOS Version ---------------
desc "iOS: Increment versionCode and set versionName to package.json version"
private_lane :increase_ios_version do
	increment_build_number(xcodeproj: './ios/' + package['name'] + '.xcodeproj')
	increment_version_number(xcodeproj: './ios/' + package['name'] + '.xcodeproj', version_number: 		package['version'])
end

desc "Bump build numbers, and set the version to match the pacakage.json version."
lane :bump do
  increase_android_version
  increase_ios_version
end
3. Npm scripts for automatic version bump.
Under this step, we will write some npm scripts that will automatically bump our version number (major, minor, or patch) inside our package.json file
"scripts": {
"bump-patch": "npm version patch --no-git-tag-version && bundle exec fastlane bump",
"bump-minor": "npm version minor --no-git-tag-version && bundle exec fastlane bump",
"bump-major": "npm version major --no-git-tag-version && bundle exec fastlane bump"
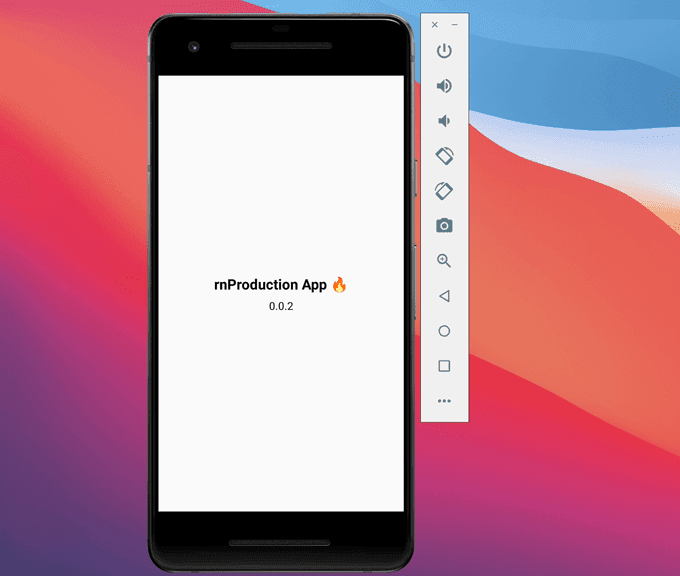
}Below is the current version number of our package.json file (v0.0.1)
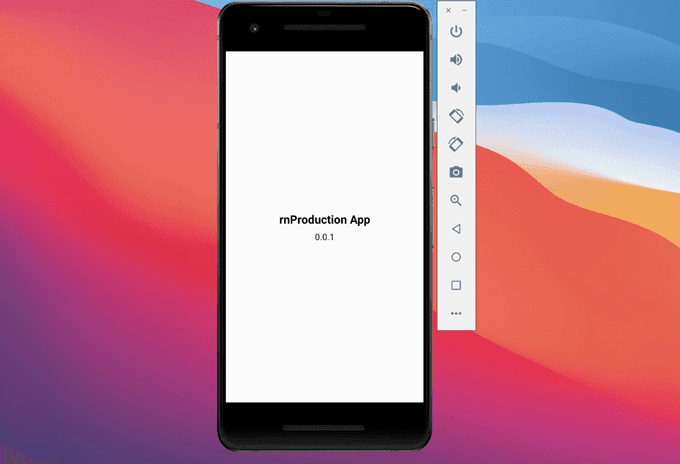
We will update our code and test our script by bumping the patch number from 0.0.1 to 0.0.2 by running the command npm run bump-patch . If you want to bump the minor or major number, replace the command with npm run bump-minor and npm run bump-major respectfully.

Building a CI/CD pipeline using Github Actions with Fastlane
Under this section, we will use Github’s workflow automation tool Github Actions to run test suites, scripts, deploy code, etc based on certain Github Events such as a pull_request, push, merge, etc on a particular branch of our repository.
We will:
- Set up Github Actions in our repository
- Create a workflow to deploy code and tag each release
Setup Github Actions
Prerequisites: A GitHub repository.
There are two ways of setting up Github Actions, either remotely or locally. In this tutorial, we will look at how to set up Github actions locally in your project. The actions will be triggered if it meets a particular Github Event Type once pushed to Github.
Steps:
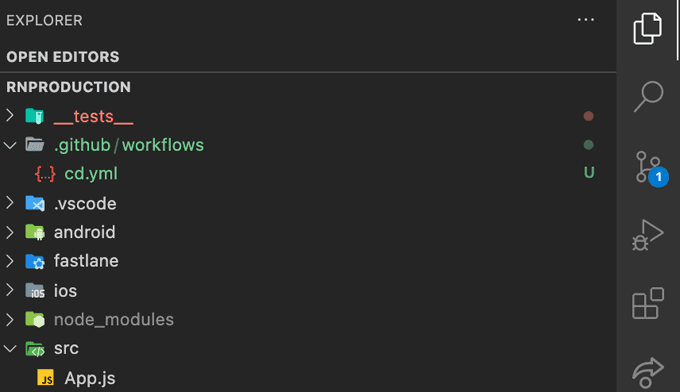
- Inside the root of your project, create a folder called
.github - Within the
.githubfolder, create a folder calledworkflows. Here, we will define our workflow files using YAML syntax. Multiple workflow files can be created in the workflows folder. We will start by creating a CI workflow file. - Create a continuous delivery workflow file cd.yml.
Create a workflow to deploy code and tag each release
- Inside the
cd.ymlfile put a name for the workflow.
name: Deploy To Firebase App Distribution And Bump Tag Version- Define which Github Event Type should trigger our actions
on:
  push:
branches:[master]- Create Jobs and Define Steps
jobs:
  build-production:
    runs-on: macos-latest

    steps:
    - name: Checkout Repository in Github VM
      uses: actions/checkout@v2
    - name: Run Node in Github VM
      uses: actions/setup-node@master
    - name: Install Dependencies
      run: |
        npm install

    - name: Install Ruby
      uses: ruby/setup-ruby@v1
      with:
        ruby-version: 2.6
    - name: Install Fastlane
      run: |
        bundle install
        bundle update fastlane
    - name: Build and Publish Mobile App
      run: |
        bundle exec fastlane android distribute
In the script above, we did the following:
- added a job “build-production” to run a series of steps in other to build our app for production.
- run the job on a macOS virtual machine. I had issues running this workflow on an ubuntu virtual machine
- actions/checkout@v2: Checkout the current repository inside our Github virtual machine
- actions/setup-node@master: Install node in our virtual machine
- npm install: Install NPM package dependencies
- ruby/setup-ruby@v1: Install ruby with version number 2.6 to run Fastlane.
- bundle install: Install Fastlane
- bundle update fastlane: Update Fastlane.
- bundle exec fastlane android distribute: build and release code to Firebase App Distribution.
At this moment, I can say we have come very far in getting close to complete our Continuous Delivery workflow. But unfortunately, when we run our workflow, it will fail.
The Problem
In part 3 of this series, we kept all of our sensitive information needed for Fastlane to build our code in a .env file and hid it in a.gitignore file so that such secrets won’t be pushed to our version control system(Github).
Now, we are no longer running Fastlane on our local machine like we did in part 3 but rather in a Virtual Machine on Github. And this virtual machine has no access to these secrets we have kept away from our repository on Github.
We need to find a way of making these secrets accessible to the virtual machine inside Github and at the same time not exposing these secrets.
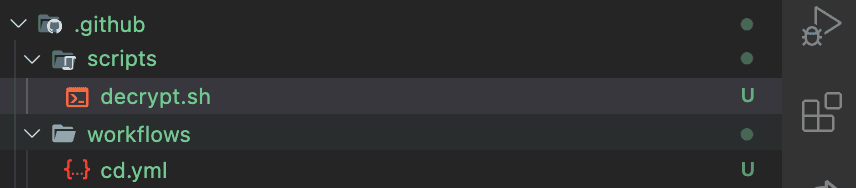
The Secrets
The ideal solution is to encrypt the secrets using a tool called gpg. Then inside of our .github folder, create a folder scripts and a file decrypt.sh inside of the scripts folder to decrypt our encrypted file. This will make our secrets available inside our GitHub virtual machine without exposing any secrets.
Note: check out gpg official documentation site on how to install it on your local machine here.
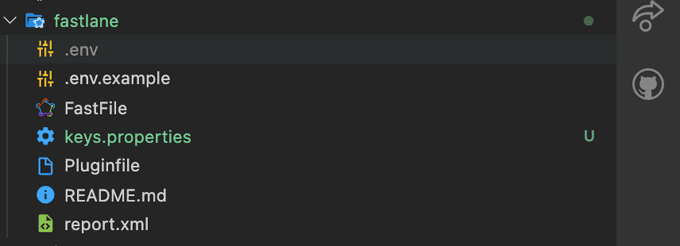
Modifying Fastlane Folder
We will make some changes to our .env file. We will move the secrets in there into keys.properties file.
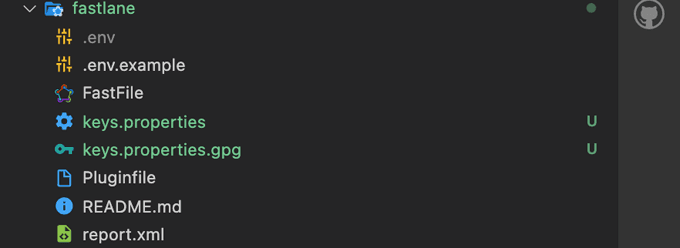
Encrypt the key and keystore file using gpg tool.
gpg —- symmetric —- cipher-algo AES256 fastlane/keys.propertiesWhen prompted, enter a passphrase to complete the encryption process. Remember to keep the password safe inside your Github Actions secretes on Github.

Note: An encrypted file keys.properties.gpg file will be created afterward.
Repeating the same steps, encrypt the keystore file.
gpg -- symmetric -- cipher-algo AES256 android/app/your-keystore.keystoreAn encrypted file your-keystore.keystore.gpg will be created afterwards.
Ignoring files inside .gitignore
- Remove .env file from .gitignore file. This is because we want to populate the secrets inside the .env file after the decrypt.sh script has run in Github’s virtual machine.
- Add keys.properties to .gitignore to protect sensitive information.
Script to decrypt the encrypted files
- Open
decrypt.shfile inside.github/scripts/folder - Add the code below:
#!/bin/sh

# Decrypt the file
# --batch to prevent interactive command
# --yes to assume "yes" for questions

gpg --quiet --batch --yes --decrypt --passphrase="$KEYS_KEYSTORE_PASSPHRASE" \
--output android/app/release-key.keystore android/app/release-key.keystore.gpg

gpg --quiet --batch --yes --decrypt --passphrase="$KEYS_KEYSTORE_PASSPHRASE" \
--output fastlane/keys.properties fastlane/keys.properties.gpg
Recap of what we’ve done under this section
- created a keys.properties file
- moved all the secrets in .env file into keys.properties
- encrypted keys.properties and release-key.keystore files and store a passphrase inside Github Actions secrets on Github.
- Ignored keys.properties file and removed .env file from .gitignore
- Wrote a script inside .github/scripts/decrypt.sh to decrypt the encrypted files.
Updating the Workflow file:
Below is a script that will decrypt our encrypted files when our workflow is triggered and running inside a Github virtual machine.
- name: Decrypting
  run: sh ./.github/scripts/decrypt.sh
  env:
    KEYS_KEYSTORE_PASSPHRASE: ${{secrets.KEYS_KEYSTORE_PASSPHRASE}}
- name: Make fastlane/keys.properties executable
  run: |
    chmod +x fastlane/keys.properties
- name: Dump fastlane/keys.properties into .env file
  run: |
    cat fastlane/keys.properties > fastlane/.env
If you’ve followed each step, you should have the same code below:
name: Deploy To Firebase App Distribution And Bump Tag Version

on:
  push:
    branches: [master]

jobs:
  build-production:
    runs-on: macos-latest

    steps:
      - name: Checkout Repository on Github VM
        uses: actions/checkout@v2

      - name: Run Node in VM
        uses: actions/setup-node@master

      - name: Decrypting
        run: sh ./.github/scripts/decrypt.sh
        env:
          KEYS_KEYSTORE_PASSPHRASE: ${{secrets.KEYS_KEYSTORE_PASSPHRASE}}

      - name: Make fastlane/keys.properties executable
        run: |
          chmod +x fastlane/keys.properties

      - name: Dump fastlane/keys.properties to .env file
        run: |
          cat fastlane/keys.properties > fastlane/.env

      - name: Install Ruby
        uses: ruby/setup-ruby@v1
        with:
          ruby-version: 2.6

      - name: Install Dependencies
        run: npm install

      - name: Install Fastlane
        run: |
          bundle install
          bundle update fastlane

      - name: Build and Publish Mobile App
        run: |
          bundle exec fastlane android distribute
Tag Version Release:
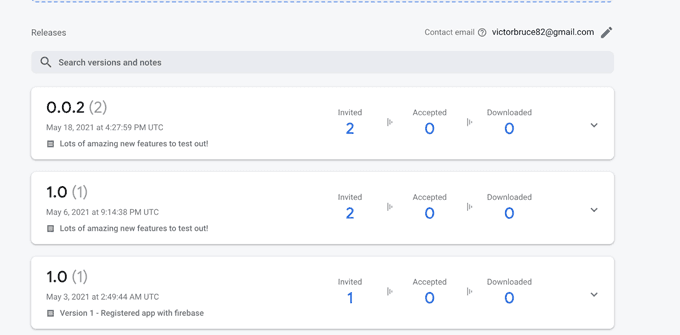
We are left with the last piece of the puzzle and that is tagging each release with a tag number. After every successful deployment of our code to Firebase App Distribution, we want to tag the latest commit(head) with the App’s version number.
Tagging is very important because it allows developers to mark important checkpoints in the course of their project development and essentially give your commit a special name.
We will add another job to tag our latest release when the build-production job has run and completed successfully.
Updating the Workflow
tag-version-release:
    needs: build-production
    runs-on: ubuntu-latest

    steps:
      - uses: actions/checkout@v2
      - uses: actions/setup-node@master

      - name: Install Dependencies
        run: |
          npm install

      - name: Get Version Number
        run: |
          git config --local user.email "youremail@domain.com"
          git config --local user.name "username"
          export PACKAGE_VERSION=$(node -p -e 'require("./package.json").version')
          git tag -a "$PACKAGE_VERSION" -m "latest version"
          git push origin --tags
Below is an explanation of the script above:
needs: build-production: this line means that the tag-version-release job should only run when the build-production job has completed successfully- get version number block:
- We configure git with our username and email so that we can run git commands inside the virtual machine.
- We also get the version number from
package.jsonand stored it in a variable called $PACKAGE_VERSION - Lastly, we created a tag and pushed it to our repository.
Workflow Live in Action
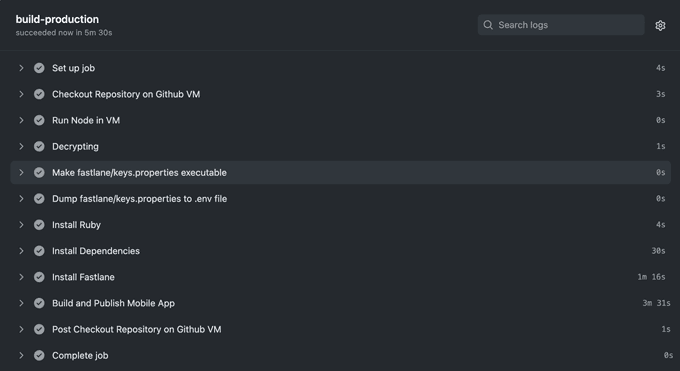
💡Pro Tip: In case you find this error Plugin ‘firebase_app_distribution’ was not properly loaded update your plugin by running the command bundle exec fastlane update_plugins
Recap:
- Built a CI/CD pipeline that deploys our code to Firebase App Distribution when a Github Event Type gets triggered using Github Actions and Fastlane.
- Tag each release version automatically.
- Learned how to encrypt and decrypt files using the tool gpg.